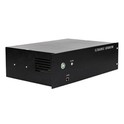
Calibrating a 4000W ultrasonic generator is a crucial process that ensures optimal performance and longevity of the equipment. As a supplier of high - power ultrasonic generators, including the 4000W Ultrasonic Generator, I understand the importance of accurate calibration. In this blog, I will guide you through the step - by - step process of calibrating a 4000W ultrasonic generator.
Understanding the Basics of Ultrasonic Generators
Before diving into the calibration process, it's essential to understand what an ultrasonic generator does. An ultrasonic generator is an electronic device that produces high - frequency electrical energy, typically in the range of 20 kHz to 100 kHz, which is then converted into mechanical vibrations by a transducer. These vibrations are used in various applications such as ultrasonic cleaning, welding, cutting, and emulsification.
A 4000W ultrasonic generator is designed to deliver a relatively high amount of power, making it suitable for large - scale industrial applications. However, to achieve the best results, it needs to be calibrated correctly.
Pre - Calibration Preparations
Safety First
Calibrating an ultrasonic generator involves working with electrical components, so safety should be your top priority. Ensure that you are wearing appropriate personal protective equipment (PPE) such as insulated gloves and safety glasses. Disconnect the generator from the power source before starting any calibration work.
Gather Necessary Tools
You will need the following tools for the calibration process:
- A multimeter: This is used to measure voltage, current, and resistance.
- An oscilloscope: It helps in visualizing the electrical signals and checking the waveform.
- A power analyzer: This device measures the real power, apparent power, and power factor of the generator.
- A frequency counter: To measure the operating frequency of the generator.
Check the Generator and Transducer
Inspect the 4000W ultrasonic generator and the connected transducer for any visible damage. Look for loose connections, frayed wires, or any signs of overheating. If you notice any issues, repair or replace the damaged components before proceeding with the calibration.
Step - by - Step Calibration Process
Step 1: Set the Initial Parameters
Connect the power analyzer, multimeter, oscilloscope, and frequency counter to the appropriate terminals of the ultrasonic generator. Refer to the generator's user manual for the correct connection points.
Power on the generator and set the initial parameters such as the frequency and power output. Most 4000W ultrasonic generators allow you to adjust these parameters using the control panel. Set the frequency to the nominal value specified by the manufacturer, which is usually around 20 kHz - 40 kHz.
Step 2: Measure the Input Power
Use the power analyzer to measure the input power of the generator. Compare the measured value with the rated power of the 4000W ultrasonic generator. If the measured power is significantly different from the rated power, there may be an issue with the power supply or the internal components of the generator.
Step 3: Check the Frequency
Use the frequency counter to measure the operating frequency of the generator. The measured frequency should be within the tolerance range specified by the manufacturer. If the frequency is off, adjust the frequency control on the generator until the desired frequency is achieved.
Step 4: Analyze the Waveform
Connect the oscilloscope to the output terminals of the generator to visualize the electrical waveform. A proper ultrasonic generator should produce a clean and stable sinusoidal waveform. Look for any distortion, noise, or irregularities in the waveform. If you notice any issues, it could indicate a problem with the generator's internal circuitry or the transducer.
Step 5: Measure the Output Voltage and Current
Use the multimeter to measure the output voltage and current of the generator. Calculate the output power using the formula (P = VI) (where (P) is power, (V) is voltage, and (I) is current). Compare the calculated output power with the set power on the generator's control panel. If there is a significant difference, adjust the power control until the desired output power is achieved.
Step 6: Load Testing
Connect the transducer to the generator and apply a load. This could be a test piece or a sample that is representative of the actual application. Observe the performance of the ultrasonic system. Check for proper vibration of the transducer and the effectiveness of the ultrasonic process. Make any necessary adjustments to the frequency, power, or other parameters based on the observed performance.
Step 7: Fine - Tuning
After the initial calibration and load testing, fine - tune the parameters for optimal performance. This may involve making small adjustments to the frequency, power, and other settings to achieve the best results for your specific application.


Troubleshooting During Calibration
During the calibration process, you may encounter some common issues. Here are some troubleshooting tips:
Low Power Output
- Check the power supply: Ensure that the generator is receiving the correct voltage and that the power source is stable.
- Inspect the transducer: A faulty transducer can cause low power output. Check for any damage or loose connections.
- Check the internal components: There may be a problem with the generator's internal circuitry, such as a damaged capacitor or transistor.
Incorrect Frequency
- Check the frequency control: Make sure that the frequency control on the generator is working properly.
- Check for interference: External electromagnetic interference can affect the frequency of the generator. Try moving the generator away from other electronic devices.
Waveform Distortion
- Check the transducer impedance: Mismatched transducer impedance can cause waveform distortion. Make sure that the transducer is properly matched to the generator.
- Inspect the internal components: A damaged amplifier or oscillator can also lead to waveform distortion.
Importance of Regular Calibration
Regular calibration of your 4000W Ultrasonic Generator is essential for several reasons. Firstly, it ensures that the generator is operating at its optimal performance, which can improve the efficiency and quality of your ultrasonic processes. Secondly, it helps in detecting any potential issues early, which can prevent costly breakdowns and downtime. Finally, regular calibration can extend the lifespan of the generator and the connected transducer.
Other Power Options
In addition to the 4000W ultrasonic generator, we also offer 3000W Ultrasonic Generator and 6000W Ultrasonic Generator options. These generators are suitable for different applications based on the power requirements. Whether you need a lower - power generator for small - scale applications or a higher - power one for large - scale industrial processes, we have the right solution for you.
Contact for Purchase and Further Assistance
If you are in the market for a high - quality ultrasonic generator or need further assistance with calibration or troubleshooting, we are here to help. Our team of experts can provide you with detailed information about our products and guide you through the selection process. We offer reliable after - sales support to ensure that you get the most out of your ultrasonic equipment.
References
- Manufacturer's user manual for the 4000W ultrasonic generator.
- Technical literature on ultrasonic technology and calibration procedures.