How to Troubleshoot if the ResoLab - Lab Grade Ultrasonicator Does Not Work Properly
As a supplier of ResoLab lab grade ultrasonicators, I understand how frustrating it can be when your valuable equipment fails to operate as expected. Ultrasonication is a crucial process in many laboratory applications, such as cell disruption, sample preparation, and degassing. In this blog post, I'll guide you through a series of troubleshooting steps to identify and potentially resolve issues with your ResoLab ultrasonicator.
Initial Checks
Before diving into complex troubleshooting, it's essential to perform some basic checks. First, ensure that the ultrasonicator is properly plugged into a functioning power outlet. Sometimes, a loose connection can be the root cause of the problem. Check the power cord for any visible signs of damage, such as frayed wires or cuts. If you find any issues with the cord, it's advisable to replace it immediately to avoid electrical hazards.
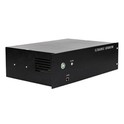
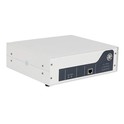
Next, verify that the power switch on the ultrasonicator is in the "On" position. Some models may have additional safety switches or interlocks that need to be engaged for the device to operate. Refer to the user manual for your specific model, such as the ResoLab - 2000 Lab Grade Ultrasonicator, ResoLab - 1000 Lab Grade Ultrasonicator, or ResoLab - 500 Lab Grade Ultrasonicator, to understand the correct operation of these switches.
Display and Control Panel Issues
If the ultrasonicator has a digital display, check if it is showing any error messages. Error codes can provide valuable clues about the nature of the problem. Refer to the user manual to interpret these error codes and follow the recommended troubleshooting steps. For example, an "Overheat" error may indicate that the device has been running for too long without proper cooling. In such cases, allow the ultrasonicator to cool down before attempting to use it again.
If the display is blank or unresponsive, it could be due to a power issue or a problem with the control panel. Try resetting the device by turning it off, unplugging it from the power source, waiting for a few minutes, and then plugging it back in and turning it on. If the problem persists, there may be a fault with the display or control panel circuitry, and it may be necessary to contact our technical support team for further assistance.
Probe and Horn Problems
The probe and horn are critical components of the ultrasonicator, as they are responsible for generating and transmitting the ultrasonic waves. Check the probe for any signs of damage, such as cracks, chips, or excessive wear. A damaged probe can significantly affect the performance of the ultrasonicator and may even cause it to malfunction. If you notice any damage to the probe, it should be replaced immediately.
Ensure that the probe is properly attached to the horn. A loose or improperly installed probe can result in poor ultrasonic transmission and reduced efficiency. Follow the instructions in the user manual to correctly install and tighten the probe. Additionally, check the horn for any signs of damage or debris. Clean the horn regularly to prevent the buildup of contaminants, which can interfere with the ultrasonic waves.
Liquid Level and Temperature
The level and temperature of the liquid in the sample container can also affect the performance of the ultrasonicator. Make sure that the liquid level is within the recommended range specified in the user manual. If the liquid level is too low, the probe may not be fully submerged, which can lead to inefficient ultrasonic transmission. On the other hand, if the liquid level is too high, it may cause splashing and damage to the ultrasonicator.
Monitor the temperature of the liquid during the ultrasonication process. Excessive heat can damage the sample and the ultrasonicator. Some ultrasonicator models are equipped with temperature sensors and automatic shut - off features to prevent overheating. If the liquid temperature rises too quickly, reduce the power output or increase the duty cycle of the ultrasonicator to allow for better heat dissipation.


Amplitude and Frequency Settings
Incorrect amplitude and frequency settings can cause the ultrasonicator to operate inefficiently or not at all. Refer to the user manual for the recommended amplitude and frequency settings for your specific application. Adjust these settings carefully using the control panel on the ultrasonicator. Keep in mind that different samples may require different settings, so it may be necessary to perform some trial - and - error to find the optimal settings for your experiment.
If you are experiencing issues with the amplitude or frequency settings, check if the device is calibrated correctly. Over time, the calibration of the ultrasonicator may drift, resulting in inaccurate settings. You can use a calibration tool or contact our technical support team to perform a calibration check and adjustment if necessary.
Environmental Factors
The environment in which the ultrasonicator is used can also impact its performance. Ensure that the device is placed on a stable and level surface. Vibrations from an unstable surface can cause the probe to move and affect the ultrasonic transmission. Additionally, keep the ultrasonicator away from sources of electromagnetic interference, such as large motors or other electronic devices.
The ambient temperature and humidity can also affect the operation of the ultrasonicator. High humidity can cause condensation inside the device, which can damage the electrical components. Try to maintain a stable and moderate environment for the ultrasonicator to ensure its reliable performance.
When to Seek Professional Help
If you have followed all the above troubleshooting steps and the ultrasonicator still does not work properly, it may be time to seek professional help. Our technical support team is available to assist you with more in - depth troubleshooting and repair services. We have a team of experienced technicians who are familiar with all ResoLab ultrasonicator models and can quickly diagnose and resolve any issues.
In addition to troubleshooting, we also offer a range of replacement parts and accessories for your ResoLab ultrasonicator. Whether you need a new probe, horn, or control panel, we can provide you with high - quality components to keep your device running smoothly.
Contact Us for Purchase and Support
If you are experiencing persistent problems with your current ultrasonicator or are considering purchasing a new ResoLab lab grade ultrasonicator, we encourage you to contact us. Our sales team is ready to assist you in selecting the right model for your specific needs and budget. We offer competitive pricing, fast delivery, and excellent after - sales support.
Don't let equipment issues slow down your research or laboratory work. Reach out to us today, and let us help you get the most out of your ResoLab ultrasonicator.
References
- ResoLab Ultrasonicator User Manuals (for ResoLab - 2000, ResoLab - 1000, and ResoLab - 500 models)
- General Laboratory Ultrasonication Guidelines and Best Practices