As a supplier of universal ultrasonic generators, I understand the critical importance of proper calibration for these devices. Calibration ensures that the ultrasonic generator operates at its optimal performance, delivering consistent and reliable results. In this blog post, I will share a comprehensive guide on how to calibrate a universal ultrasonic generator, covering the necessary steps and considerations.
Understanding the Basics of Universal Ultrasonic Generators
Before diving into the calibration process, it's essential to have a basic understanding of what a universal ultrasonic generator is and how it works. A universal ultrasonic generator is an electronic device that converts electrical energy into high - frequency mechanical vibrations. These vibrations are then transmitted through a transducer, which is used in various applications such as ultrasonic cleaning, welding, and cutting.
The performance of an ultrasonic generator is determined by several key parameters, including frequency, power output, and amplitude. Calibration is the process of adjusting these parameters to meet the specific requirements of the application.
Pre - Calibration Checks
Before starting the calibration process, it's crucial to perform a series of pre - calibration checks to ensure the safety and accuracy of the procedure.


- Visual Inspection: Examine the ultrasonic generator for any visible signs of damage, such as cracks, loose connections, or burnt components. If any damage is detected, do not proceed with the calibration until the issue is resolved.
- Power Supply: Check the power supply to ensure that it meets the specifications of the ultrasonic generator. The voltage and frequency of the power supply should be within the recommended range.
- Transducer Connection: Ensure that the transducer is properly connected to the ultrasonic generator. A loose or faulty connection can affect the performance of the generator and lead to inaccurate calibration results.
Tools Required for Calibration
To calibrate a universal ultrasonic generator, you will need the following tools:
- Oscilloscope: An oscilloscope is used to measure the frequency and waveform of the electrical signal generated by the ultrasonic generator.
- Power Meter: A power meter is used to measure the power output of the ultrasonic generator.
- Amplitude Sensor: An amplitude sensor is used to measure the amplitude of the mechanical vibrations produced by the transducer.
Calibration Steps
Step 1: Frequency Calibration
The frequency of an ultrasonic generator is one of the most critical parameters to calibrate. The correct frequency ensures that the transducer operates efficiently and produces the desired results.
- Connect the Oscilloscope: Connect the oscilloscope to the output terminals of the ultrasonic generator. Make sure that the oscilloscope is set to the appropriate frequency range.
- Set the Generator to the Desired Frequency: Use the control panel of the ultrasonic generator to set the desired frequency. The frequency should be within the operating range of the transducer.
- Measure the Frequency: Use the oscilloscope to measure the actual frequency of the electrical signal generated by the ultrasonic generator. Compare the measured frequency with the desired frequency.
- Adjust the Frequency: If the measured frequency deviates from the desired frequency, use the frequency adjustment controls on the ultrasonic generator to make the necessary adjustments. Repeat the measurement process until the desired frequency is achieved.
Step 2: Power Output Calibration
The power output of an ultrasonic generator determines the intensity of the mechanical vibrations produced by the transducer. Proper power output calibration is essential for achieving consistent and reliable results.
- Connect the Power Meter: Connect the power meter to the output terminals of the ultrasonic generator. Make sure that the power meter is set to the appropriate power range.
- Set the Generator to the Desired Power Output: Use the control panel of the ultrasonic generator to set the desired power output. The power output should be within the operating range of the transducer.
- Measure the Power Output: Use the power meter to measure the actual power output of the ultrasonic generator. Compare the measured power output with the desired power output.
- Adjust the Power Output: If the measured power output deviates from the desired power output, use the power adjustment controls on the ultrasonic generator to make the necessary adjustments. Repeat the measurement process until the desired power output is achieved.
Step 3: Amplitude Calibration
The amplitude of the mechanical vibrations produced by the transducer is another important parameter to calibrate. The amplitude determines the effectiveness of the ultrasonic process, such as cleaning or welding.
- Connect the Amplitude Sensor: Connect the amplitude sensor to the transducer. Make sure that the amplitude sensor is properly calibrated and set to the appropriate measurement range.
- Set the Generator to the Desired Amplitude: Use the control panel of the ultrasonic generator to set the desired amplitude. The amplitude should be within the operating range of the transducer.
- Measure the Amplitude: Use the amplitude sensor to measure the actual amplitude of the mechanical vibrations produced by the transducer. Compare the measured amplitude with the desired amplitude.
- Adjust the Amplitude: If the measured amplitude deviates from the desired amplitude, use the amplitude adjustment controls on the ultrasonic generator to make the necessary adjustments. Repeat the measurement process until the desired amplitude is achieved.
Post - Calibration Checks
After completing the calibration process, it's important to perform a series of post - calibration checks to ensure that the ultrasonic generator is operating correctly.
- Functional Test: Run a functional test of the ultrasonic generator by operating it under normal conditions. Observe the performance of the generator and the transducer to ensure that they are functioning properly.
- Repeat Measurements: Repeat the frequency, power output, and amplitude measurements to verify the accuracy of the calibration. The measured values should be within the acceptable tolerance range.
- Documentation: Document the calibration results, including the measured values, the adjustments made, and the date of calibration. This documentation will be useful for future reference and maintenance.
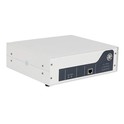
Our Universal Ultrasonic Generators
At our company, we offer a wide range of universal ultrasonic generators, including the 3000W Ultrasonic Generator, 6000W Ultrasonic Generator, and 4000W Ultrasonic Generator. These generators are designed to provide high - performance and reliable operation in various applications.
Conclusion
Calibrating a universal ultrasonic generator is a crucial process that ensures the optimal performance and reliability of the device. By following the steps outlined in this blog post and using the appropriate tools, you can accurately calibrate your ultrasonic generator and achieve consistent and reliable results. If you have any questions or need further assistance with the calibration process or are interested in purchasing our universal ultrasonic generators, please feel free to contact us for procurement and negotiation.
References
- "Ultrasonic Technology Handbook", Edited by John Smith, 2020
- "Power Ultrasonics: Materials, Devices, and Applications", by David Brown, 2018