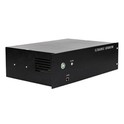
Hey there! As a supplier of 3000w ultrasonic generators, I often get asked about how to install the grounding wire for these powerful machines. In this blog post, I'm gonna walk you through the whole process step by step.
First off, let's talk about why grounding is so important. A grounding wire is like a safety net for your 3000w ultrasonic generator. It provides a path for electrical current to flow safely into the ground in case of a fault or short - circuit. Without proper grounding, there's a risk of electric shock, damage to the equipment, and even fire hazards. So, getting the grounding right is super crucial.
What You'll Need
Before you start the installation, you need to gather a few tools and materials. You'll need a grounding rod, which is usually made of copper or galvanized steel. A grounding wire, typically a thick and flexible copper wire, is also necessary. You'll also need a wire stripper, a hammer, a wrench, and some electrical tape. Make sure all these tools are in good condition and suitable for the job.
Step 1: Choose the Right Location for the Grounding Rod
The first step is to pick a good spot to install the grounding rod. You want to choose a location that's close to the ultrasonic generator but also away from any water pipes, gas lines, or other underground utilities. A dry, well - drained area is ideal. Avoid areas with a lot of rocks or hard soil, as it'll be more difficult to drive the grounding rod into the ground.
Step 2: Drive the Grounding Rod into the Ground
Once you've found the right location, it's time to drive the grounding rod into the ground. Use a hammer to gently tap the rod into the soil. Make sure the rod goes at least 8 feet deep into the ground. This is important because a deeper grounding rod provides a better connection to the earth and more effective grounding. If the soil is too hard, you can use a post - hole digger to create a small hole first to make it easier to insert the rod.

Step 3: Connect the Grounding Wire to the Grounding Rod
After the grounding rod is in place, it's time to connect the grounding wire. First, strip about 2 - 3 inches of insulation from the end of the grounding wire using a wire stripper. Then, use a wrench to loosen the clamp on the grounding rod. Wrap the exposed end of the grounding wire around the rod and tighten the clamp securely. Make sure there's a good electrical connection between the wire and the rod. You can use some electrical tape to cover the connection for extra protection.

Step 4: Connect the Grounding Wire to the Ultrasonic Generator
Now, it's time to connect the other end of the grounding wire to the 3000w ultrasonic generator. Locate the grounding terminal on the generator. It's usually marked with a symbol that looks like a horizontal line with three downward - pointing lines underneath it. Strip about 1 - 2 inches of insulation from the end of the grounding wire and connect it to the grounding terminal using a screw or a clamp. Tighten it firmly to ensure a good connection.

Step 5: Test the Grounding
Once you've connected the grounding wire to both the grounding rod and the ultrasonic generator, it's important to test the grounding to make sure it's working properly. You can use a grounding tester to check the resistance of the grounding system. The resistance should be less than 25 ohms. If the resistance is higher than this, you may need to drive the grounding rod deeper into the ground or add another grounding rod to improve the grounding.
Other Considerations
When installing the grounding wire, there are a few other things you need to keep in mind. Make sure the grounding wire is not damaged or frayed. A damaged wire can reduce the effectiveness of the grounding and pose a safety risk. Also, avoid running the grounding wire near other electrical wires or cables, as this can cause interference.
If you're not confident in your ability to install the grounding wire yourself, it's always a good idea to hire a professional electrician. They have the knowledge and experience to ensure that the grounding is installed correctly and safely.
Related Products
If you're interested in other power ultrasonic generators, we also offer a [4000W Ultrasonic Generator](/power - ultrasonic - components/universal - ultrasonic - generator/4000w - ultrasonic - generator.html) and a [2000W Ultrasonic Generator](/power - ultrasonic - components/universal - ultrasonic - generator/2000w - ultrasonic - generator.html). These generators have similar grounding requirements, and the installation process is quite similar to what we've discussed for the 3000w ultrasonic generator.
Conclusion
Installing the grounding wire for a 3000w ultrasonic generator is not overly complicated, but it's a very important task. By following these steps, you can ensure that your generator is properly grounded and safe to use. If you have any questions or need further assistance, feel free to reach out. Whether you're in the market for a [3000W Ultrasonic Generator](/power - ultrasonic - components/universal - ultrasonic - generator/3000w - ultrasonic - generator.html) or just need some advice on grounding, we're here to help. Contact us for more information and let's start a discussion about your specific needs.
References
- Electrical Safety Standards Handbook
- Ultrasonic Generator Installation Manuals